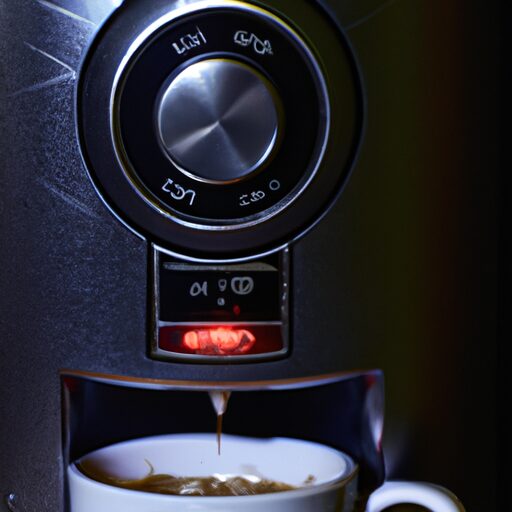
Are you tired of your morning coffee tasting less than perfect? It may be time to give your trusty Keurig coffee machine a thorough cleaning. In this article, we will share some helpful tips and tricks to ensure that your Keurig is sparkling clean and ready to brew a delicious cup of joe. From cleaning the exterior to descaling the internal components, we’ve got you covered. Say goodbye to stale coffee and hello to a rejuvenated Keurig!
Importance of Regular Cleaning
Regular cleaning is an essential part of maintaining your Keurig coffee machine and ensuring its longevity. It not only helps to prevent the buildup of mineral deposits but also ensures that your coffee tastes fresh and delicious every time. Additionally, regular cleaning helps to maintain optimal performance and prevent any potential issues that may arise from neglecting this crucial aspect of machine maintenance.
Preventing Buildup of Mineral Deposits
One of the main reasons why regular cleaning is important is to prevent the buildup of mineral deposits inside your Keurig machine. Over time, minerals present in your tap water, such as calcium and magnesium, can accumulate and clog the inner workings of the machine, leading to reduced efficiency and potential malfunctions. Taking the time to clean your machine regularly helps to remove these deposits and keep your Keurig running smoothly.
Preventing Bitter Tasting Coffee
Have you ever noticed that your coffee tastes bitter or off despite using high-quality beans? This could be due to a dirty coffee machine. The residue, oils, and leftover coffee particles that accumulate over time can affect the taste and quality of your brew. By regularly cleaning your Keurig, you can prevent the buildup of these substances and enjoy consistently great-tasting coffee every day.
Maintaining Optimal Performance
Just like any other appliance, regular cleaning is crucial for maintaining optimal performance. With regular use, various parts of your Keurig machine can become clogged or hindered by dirt and debris. This can cause the machine to work slower, produce weaker coffee, or even stop functioning altogether. By incorporating regular cleaning into your maintenance routine, you can ensure that your Keurig operates at its best and delivers coffee that exceeds your expectations every time.
Cleaning Supplies You Will Need
Before diving into the cleaning process, it’s important to gather all the necessary supplies. Here’s a rundown of the items you will need to effectively clean your Keurig coffee machine:
Vinegar
Vinegar is an excellent natural cleaning agent that can help remove mineral deposits and stubborn stains from your Keurig machine. Its acidic properties work effectively to dissolve the buildup, leaving your machine clean and fresh.
Water
Water is an essential component of the cleaning process. You will need both regular water and distilled water for different cleaning steps.
Dish Soap
Using a mild dish soap can help remove any oils and residue that may have accumulated on the external surfaces of your Keurig. This will ensure that your machine not only looks clean but also remains hygienic.
Soft Cloth
A soft cloth is ideal for wiping down the exterior surfaces of your Keurig machine. It is gentle enough to avoid scratching or damaging the materials, while also being effective at removing dirt and grime.
Toothbrush
A toothbrush with soft bristles can be handy for cleaning hard-to-reach areas or removing stubborn stains on removable parts of your Keurig machine.
With these supplies in hand, you are ready to begin the cleaning process and give your Keurig coffee machine the TLC it deserves.
Cleaning the Exterior of the Machine
To start the cleaning process, you will need to focus on the exterior surfaces of your Keurig machine. This includes the body of the machine, the drip tray, and the water reservoir. Follow these steps for a thorough cleaning:
Unplugging the Machine
Before cleaning any electrical appliance, it is essential to unplug it for safety purposes. This ensures that there is no risk of electric shock while you work on cleaning your Keurig machine.
Wiping Down with a Damp Cloth
Take a soft cloth and dampen it with water and a small amount of mild dish soap. Gently wipe down the exterior surfaces of your Keurig, including the body of the machine, the drip tray, and the water reservoir. Make sure to remove any visible dirt or residue.
Cleaning the Drip Tray and Water Reservoir
Remove the drip tray and water reservoir from the machine. Wash them with warm soapy water, using a soft cloth or sponge. Rinse thoroughly and ensure that no soap residue remains. Allow the drip tray and water reservoir to dry completely before reattaching them to the machine.
By cleaning the exterior surfaces of your Keurig machine, you not only keep it looking clean and presentable but also remove any dirt or grime that could potentially affect the quality of your coffee.
Cleaning the Removable Parts
In addition to the exterior surfaces, several removable parts of your Keurig machine also require regular cleaning to ensure optimal performance and longevity. Here are the steps to clean these parts effectively:
Removing and Cleaning the K-Cup Holder
Start by removing the K-Cup holder from your Keurig machine. This can usually be done by gently lifting or sliding the holder out of its slot. Once removed, wash the K-Cup holder with warm soapy water. Use a soft cloth or toothbrush to scrub away any residual coffee grounds or oils. Rinse thoroughly and allow it to dry completely before reinserting it into the machine.
Cleaning the Water Reservoir and Lid
To clean the water reservoir, first, remove it from the Keurig machine. Wash it with warm soapy water, ensuring that you clean both the inside and outside thoroughly. Pay special attention to the lid, as it often accumulates residue and bacteria. Use a soft cloth or toothbrush to scrub away any build-up. Rinse the water reservoir and lid with clean water and dry them properly before reattaching them to the machine.
Cleaning the Drip Tray and Drip Tray Plate
To clean the drip tray and drip tray plate, simply remove them from the machine and wash them with warm soapy water. Remove any debris or residue that may have collected in the tray. Rinse thoroughly and allow them to dry completely before placing them back in the machine.
By regularly cleaning and maintaining these removable parts, you can ensure that your Keurig machine continues to function at its best and provide you with delicious coffee every time.
Cleaning the Needle Assembly
The needle assembly is a vital component of your Keurig machine that punctures the K-Cup during the brewing process. It is important to keep this assembly clean to prevent clogs and maintain the quality of your coffee. Follow these steps to clean the needle assembly effectively:
Unplugging the Machine
As always, start by unplugging your Keurig machine to ensure your safety while cleaning.
Removing the K-Cup Holder
Remove the K-Cup holder from your Keurig machine by gently lifting or sliding it out.
Cleaning the Needle Assembly
Dip a toothbrush in vinegar and gently scrub the puncture needle located in the center of the holder. Ensure that you clean all sides of the needle to remove any coffee residue or mineral deposits. Rinse the needle assembly with clean water to remove any vinegar residue.
Reassembling the Machine
Once the needle assembly is clean and dry, reattach the K-Cup holder to the machine. Ensure that it is properly aligned and securely in place before operating your Keurig machine again.
Cleaning the needle assembly is an important maintenance step to prevent clogs and ensure the smooth operation of your Keurig machine.
Descaling the Coffee Machine
Descaling is an essential process for removing mineral deposits that can accumulate inside your Keurig machine over time. This buildup can affect the machine’s performance and the taste of your coffee. Follow these steps to descale your Keurig coffee machine properly:
Preparing the Machine for Descaling
Start by emptying the water reservoir and removing any remaining water filters. Ensure that the reservoir is completely empty before proceeding.
Running the Descaling Solution
Prepare a mixture of equal parts vinegar and water or use a descaling solution specifically designed for coffee machines. Pour the solution into the water reservoir.
Place a large cup or mug on the drip tray to catch the descaling solution.
Start the brewing cycle, selecting the largest brew size. Allow the machine to complete the brewing cycle and dispense the solution into the cup.
Discard the solution in the cup and repeat the brewing cycle until the water reservoir is empty.
Flushing with Clean Water
After descaling, thoroughly rinse the water reservoir to remove any residual solution. Fill the reservoir with clean water and run a brewing cycle without a K-Cup. Repeat this process a couple of times to ensure that all traces of the descaling solution are flushed out of the machine.
By descaling your Keurig machine regularly, you can prevent the buildup of mineral deposits and ensure that your coffee tastes fresh and delicious with every brew.
Cleaning the Keurig Water Filter
If your Keurig machine is equipped with a water filter, it is important to clean and maintain it regularly. This helps to extend its lifespan and ensures that it effectively filters impurities from your water. Follow these steps for cleaning the Keurig water filter:
Removing the Water Filter
If your Keurig machine contains a water filter, locate and remove it from the water reservoir. Follow the manufacturer’s instructions to remove the filter properly.
Rinsing the Water Filter
Hold the water filter under running water and gently rinse it for a few seconds. Make sure to remove any visible dirt or debris from the filter. Avoid using soap or cleaning agents, as they can interfere with the filter’s ability to effectively purify the water.
Replacing the Water Filter
Once the water filter has been thoroughly rinsed, reinsert it into the designated slot in the water reservoir. Follow the manufacturer’s instructions to ensure that it is correctly positioned.
Cleaning and replacing the water filter on a regular basis helps maintain the quality and taste of your coffee by filtering out impurities from the water used in the brewing process.
Troubleshooting Common Issues
Even with regular cleaning and maintenance, you may encounter some common issues with your Keurig machine. Here are a few troubleshooting tips to address these problems:
Machine Not Brewing
If your Keurig machine is not brewing, check if there is enough water in the reservoir. Make sure the water reservoir is properly seated and that the machine is securely plugged in. Additionally, check if the K-Cup holder is correctly positioned and clean the needle assembly if it is clogged.
Slow Brew Times
Slow brew times can indicate a clogged machine. Check the needle assembly for any coffee grounds or mineral deposits and clean it if necessary. A clogged water line can also cause slow brew times, so ensure that the water reservoir and tubes are free of any obstructions.
Leaking Water
Water leakage can occur due to various reasons, such as a loose water reservoir, damaged seals, or clogged tubes. Check the water reservoir for any cracks or damage, and tighten any loose connections. Clean the tubes and needle assembly to remove any debris that may be causing the leakage.
Error Messages
If you encounter error messages on your Keurig machine, consult the user manual or contact customer support for specific troubleshooting steps. Error messages can indicate various issues, such as a malfunctioning sensor or a need for descaling.
If these troubleshooting tips do not resolve the issue, it may be necessary to contact Keurig customer support for further assistance.
Tips & Tricks for Maintenance
To further enhance the performance and longevity of your Keurig coffee machine, consider implementing the following tips and tricks:
Using Filtered Water
Using filtered water instead of tap water can help reduce the risk of mineral deposits and improve the taste of your coffee. Filtered water is generally cleaner and has fewer impurities that can affect the flavor and performance of your machine.
Regularly Cleaning Removable Parts
Make it a habit to clean the removable parts of your Keurig machine regularly. This includes the K-Cup holder, water reservoir, drip tray, and drip tray plate. Regular cleaning helps maintain the cleanliness of your machine and prevents any residue or debris from affecting the quality of your coffee.
Checking for Updates and Recalls
Periodically check for updates or recalls related to your specific Keurig model. Manufacturers often release software updates or recalls to address any potential issues or enhance the functioning of the machine. Staying informed and following the manufacturer’s recommendations can help keep your Keurig machine in top condition.
By following these tips and tricks, you can ensure that your Keurig coffee machine remains clean, efficient, and provides you with consistently great-tasting coffee for years to come.
Conclusion
Regular cleaning and maintenance are essential for keeping your Keurig coffee machine in optimum condition. By preventing the buildup of mineral deposits, removing residue for better-tasting coffee, and addressing common issues, you can prolong the lifespan of your machine and enjoy a delicious cup of joe every day. Remember to gather the necessary supplies, clean the exterior and removable parts, descale the machine, and take care of the water filter. Troubleshoot any common issues and implement helpful tips and tricks. With regular care and maintenance, your Keurig machine will continue to delight you with the perfect cup of coffee for many years to come. Happy brewing!